The number one question asked of me is for a backpacking gear list of what I take with me on my alpine backpacking trips. So here is what I pack with me and a full gear list for a typical 3 to 5 day trip for the 3 season weather for spring, summer and fall.
When it comes to backpacking gear lists for me the items I take along are pretty much the same for 2 days on the trail all the way beyond 5 days. The only thing that changes is how much food I will pack.
Other than food the other gear selection variable that dictates how much or what I will pack is weather and researching past trip reports. By doing your research on these two items you will be prepared for the backcountry trek ahead of you. It will be the difference between being happy and not enjoying yourself.

Dial in Your Backpacking Gear List
Over the last 6 years I have really dialled in my gear kit and backpack so don’t feel you need to have it perfect for your very first trip. When you go out on trips ask friends to show you what they have packed, look inside their backpack on whats inside and how they loaded it up. Don’t rush out and buy brand new gear either.
If you can borrow from friends and family or rent gear if available in your area. Find out what you like and what you don’t like before investing your hard earned money on new backpacking gear. Don’t forget to check out used online places and gear swaps too, not all your equipment needs to be new. Once you know for sure that something is 100% what you want then buy new and buy as high of quality as possible. This will ensure it lasts and often the high end products weigh much less.
When building your your own backpacking gear lists, just as the title says, make a list. Keep track of what of everything that you are packing for a trip and how much it weights. Go out enjoy your trip and when you get home the very first thing you should do is make notes of everything you didn’t use and consider leaving that at home next time. (outside of 10 essentials). Did you really need that pillow, 4 pairs of socks and 3 shirts? Keep doing this until you consistently use all the gear, food and clothing you are packing on a trip.
Backpack Selection
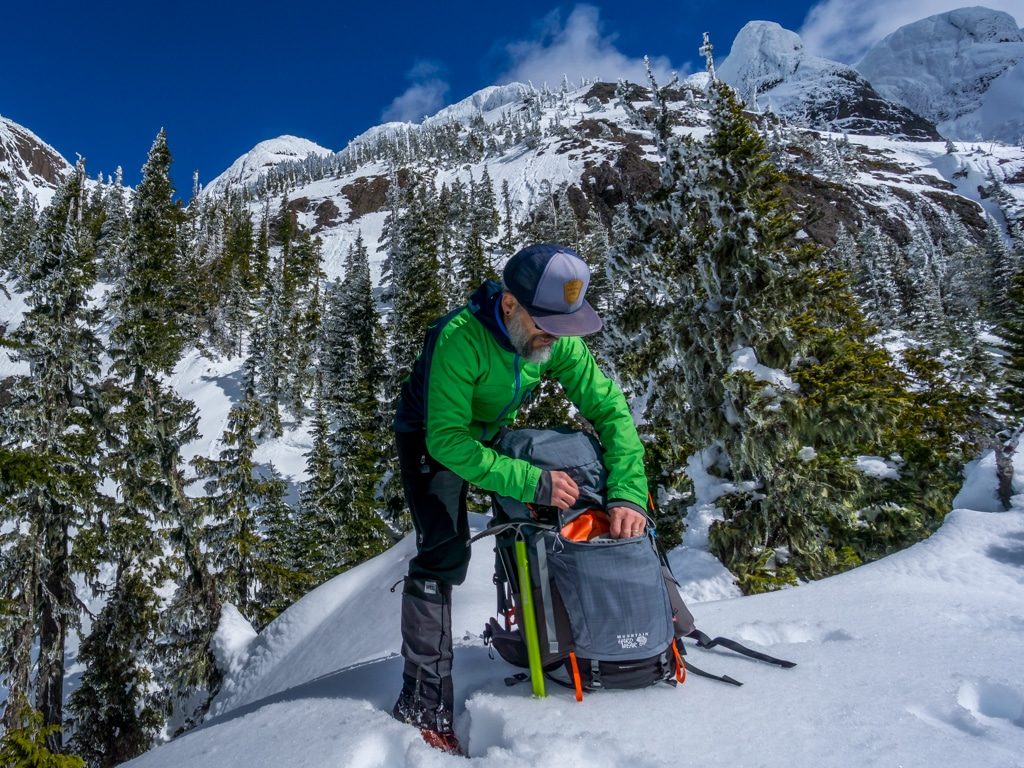
I currently run two backpacks for all of my trips with the biggest two factors affecting which one I choose being duration and season. For 75% of all my trips during the warmer 3 season backpacking activities I use my North Face Phantom 38. This pack is designed for mountaineering is lightweight at 2 pounds 5 ozs (1049 grams) as well as very durable and comfortable.
When I have a lot of extra food for long trips or I am packing my cold weather gear I will use my Mountain Hardwear Ozonic 70 backpack. This pack is 100% waterproof and with the compression straps cinched down functions well from 40-70L in capacity. The downside is on the heavier side at 4 lbs (1.87 kg) but heck it can hold everything including the kitchen sink.
On the trips when I am using the Mountain Hardwear Ozonic I will pack a minimal collapsable summit day pack. I use my Lowe Alpine Fuse 20 for day hike alpine climbs and scrambles when a bulky big pack just isn’t practical. It weighs a mere 340 grams (12 ozs).
My pro tip for waterproofing your backpack as well as have a very highly visible SOS device is to always pack a Heavy Duty Orange glad garbage bag. Garbage bags make awesome pack liners when it is raining to protect your contents. The upside is they also double as a highly visible item you can stretch out on the ground in case of an emergency to be seen from the air. Can also serve as an emergency poncho or bivy.

Ozonic 70 
Phantom 38 
Fuse 20


Camp Shelter and Sleep Systems
For the last three years I have not changed any of my tents, sleep pads or sleeping bags. It took me some time to get them dialled in but from experiences in many different conditions, locations and terrain I eventually got there.
I am now confident to recommend my core 3 shelter and sleep items in my backpacking gear list. My core 3 day plus 3 season system consists of the MSR Hubba NX solo tent, the Exped Synmat UL7 sleep pad and then the Rab Ascent 300 down sleeping bag.
I chose the MSR Hubba NX solo tent because it is free standing and is extremely light at (2 lb 7oz). For sleeping pad I has a criteria of some warmth via a good R-value because I spend my time in the alpine but also wanted very light. The Exped Synmat UL7 comes in at R3.3 and an ultralight weight of 440 grams (14 ozs). Rounding things out is the crazy light Rab Ascent 300 down sleeping bag filled with 650 loft down. With a comfort rating of 6 degrees C and weighs a super light 840 grams (1 lb 13 oz) I am a huge fan of this bag.
I have three options to this kit that i will switch in on occasion. When I know for 100% that there will not be rain and that there is no bugs I do enjoy using my Outdoor Research Helium bivy which tips the scales at 800 grams. When I know it will be cold out and most likely sleeping on snow I switch out the Big Agnes Insulated air core that has a rating of R4.1 but is a fair bit heavier. Then for those colder nights I absolutely love my Marmot Plasma 30 down sleeping bag. With 875+ down this bag is ultralight at 676 grams (1 lb 8oz) and ultra-warm with a lower limit of 0 degrees C.
I don’t think you need to have an overly warm bag or pad for summer as I find it more affordable and also easier to put on the extra layers you have already packed in your bag. If you sleep cold put on your down coat, warmer socks and toque.
Both tents come with their own stuff sacks but for the sleeping bags I ditch the stuff sacks they come with. I protect my sleeping bags and also compress them down with a Sea To Summit gore-tex compression sack. I do not pack a pillow as I typically just use my clothing stuff sack or a jacket balled up for a pillow.

Hubba NX Solo Tent 
Outdoor Research Helium Bivy
Cook System and Food
I haven’t really made any changes in this department for years. When it comes to cooking I keep it extremely simple and my main goal is keeping things light. My system comprises of a MSR pocket rocket stove, MSR titanium cup, MSR titanium pot and a Sea to Summit titanium long spoon. I keep it all tucked along with an 4oz canister fuel in a MEC 2 litre stuff sack. The small 4oz can is plenty of fuel for a 3-5 day trip as long as you dont have to melt snow.
I will bring my MSR Duo Windburner 1.8L stove kit if I am on a climbing trip with a partner and we are splitting gear. I typically stick with the pocket rocket setup though as it is so compact and light. It weighs only 466 grams (16 ozs) with fuel weight included.

expanded full stove system 
stove cup and pot all nest inside

When it comes to food in my backpacking gear list the goal is to target about 1.6 pounds per day and be around 3000 calories. I have over time found out what I like and don’t like for packing food.
Variety is key throughout the day so I don’t get sick of eating any one particular type of energy bar or snack. Don’t worry about running a bit of a deficit for food over 3 days, eat a big meal the morning or day before you leave and remember you can easily spoil yourself with a huge meal post hike.
Each of my days of food I separate into individual large zip-loc bags (please reuse your bags over and over each trip to decrease your single use plastic) I divide them this way to keep myself organized and to make sure I don’t eat any of my next days food. I do recommend taking a bit of extra food though in case situations warrant having to spend an additional day on the trail.
Remember also if you plan to leave on the morning of day 1 and be out on day 4 as an example that you don’t need that first breakfast and that last supper.
My go to for breakfast is 2x packs of instant oatmeal and as a pro tip you can eat right out of the bag. I don’t eat meat and usually pack a vegetarian backpacker meal for supper. For after supper snack I like cheezies for huge calories to weight and my daytime treat is a snickers bar. Otherwise I enjoy Clif shot blocks, GU gels, Naak Bars and then extra old cheddar with crackers for lunch.
I keep all of my food in a MEC 5 litre stuff sack (or 2x of them if I don’t have enough room). I will then hang the bag from a tree with a small length of cord I carry. (bear canisters not required in Canada where I hike)
I am fortunate that the places I travel have very high quality moving fresh water sources. For this reason I don’t currently own a filter and stick to using Aquatabs or boiling to manage my water purification. I don’t use a hydration pack on my trips as I like to readily be able to see and manage my water.
I carry a 500ml wide mouth Nalgene bottle and if water is sparse I will carry a second empty gatorade bottle in my pack. I use the Nalgene bottles as I like the measurement graduations on them as my cup and pot don’t have any.
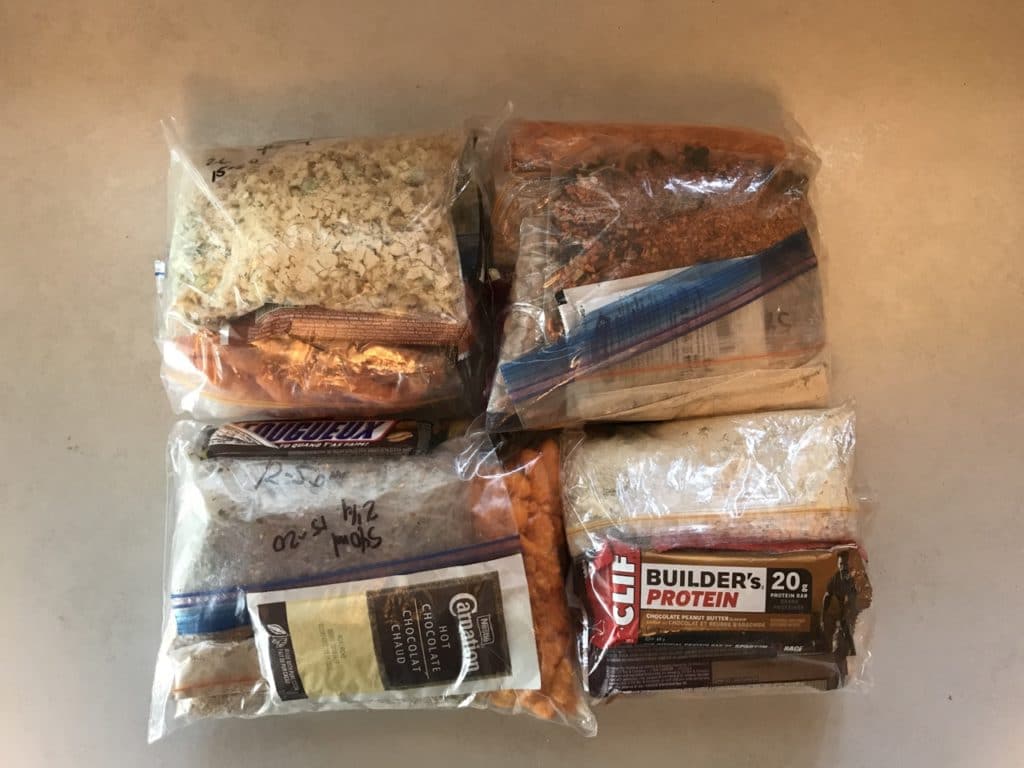
4 days of food for the trail 
contents of 1 day exploded in middle 
3 days of food for the trail 
3 days all packaged and 1 contingency day
10 Essentials a Must in Your Backpacking Gear List
The big difference between my day pack and a multi day pack when it comes to selecting my backpacking gear list is just shelter, sleeping and cooking. On top of the 10 essentials I add my toothbrush, comb, baby wipes, a ziploc and toilet paper for these longer trips. All these items fit into a MEC 2 litre stuff sack.
What I pack for ten essentials does not change no matter the length of trip.
- Navigation/Communication: I use ViewRanger on my iPhone 7Plus (download maps prior for offline use) as my GPS navigation device. I also have my inReach personal satellite communicator and SOS device. I pack a spare USB battery pack that can recharge both as well. My packs have integrated whistles but I also carry a Fox40 whistle.
- Headlamp: plus extra batteries, I love my simple Petzl lamp
- Sun protection: sunglasses, sunscreen and spf rated lip balm
- First aid: + pain meds plus cold, antihistamine, duct tape & moleskin
- Knife: I pack a small climbing knife that can clip to my harness
- Fire: matches, lighter plus my stove comes with an ignitor
- Shelter: even though I have a tent I still pack a SOL emergency bivy
- Extra food: as mentioned pack an extra day
- Extra water: good pre-trip research is key on water availability
- Extra clothes: we have this covered because we are backpacking
Clothing and Footwear
This was one area I chronically overpacked until I realized I was never using all the stuff I brought. It was taking up room and weight on each trip. This goes back to making a list and keeping track of what you use and what you don’t use each time out. Now when I go on a trip longer than 2 days I pack the following;
- 1 pair of shorts and 1 pair of pants, wear one while other is packed
- 3 pair of Stance socks, 1 pair to alternate & 1 pair wool for sleep
- 2 pairs of SAXX underwear, 1 to wear & 1 dry (rain/sweat) for sleep
- Mountain Hardwear down insulated coat (so light it goes on all trips)
- Norrona Gore-tex rain wind shell jacket
- 1 t-shirt, 1 long sleeve UV rated, 1 long sleeve merino quarter zip, merino baselayer tights if weather dictates
- hat, headband, buff, toque, gloves (adjusted seasonally for warmth)
- ultralight camp shoes, Apollo Moc from Native
- gaiters – I only wear gaiters when snow terrain planned
- Trail runners/hikers – I will always wear shoes on approach trails and lately wear either my MQM Ace Mid or MTL Cirrus
- Mountaineering boots – If objective requires I pack my Salewa Rapace
Backpacking Gear List Additional Equipment
For additional equipment that is added to my backpacking gear list will depend on the objective. As most of my trips are very elevated with rough terrain I love my single extendable Black Diamond carbon fibre trekking pole. If I am scrambling I will bring my Black Diamond climbing helmet. One thing I have always started packing now when scrambling is a 5 metre length of 5mm cordalette as it is a good length to create a hand line for tough down climbs along with packing one sling and a carabiner.
Then from there we jump into technical terrain and this is where things like ropes, harnesses, crampons, ice axe, slings and trad gear get involved. For the typical hiker none of this will be needed but if you do start exploring this terrain consider taking a mountaineering course or get mentorship by joining a local club like the Alpine Club of Canada.
When I do want to get those high end images I am most well know for (check out my gallery) then I pack my digital camera. For a camera I am using a Sony a6500 mirrorless crop sensor digital. When in the alpine or on the trail I will typically pack my F4 10-18mm wide angle or F4 16-105mm telephoto.
Backpacking Gear List Weight Overview
While by no means am I an “ultra-light” thru hiker with minimal setups I do strive to have the lightest pack possible. I find the lighter my pack the more I enjoy the trip and can focus on my surroundings rather than suffering hauling a heavy load. Using the image below for my full backpacking gear list here is my most recent trip weigh in using the LighterPack website.
I hope this article helps you out as you optimize and build your backpacking gear list. I am thinking of making a few changes to my equipment and currently looking at a lighter shorter sleeping pad and trying a Thermarest down quilt rather than a bag. For non-alpine trips and longer thru style hikes I also want to look into minimal lightweight 38-45 litre packs like the Osprey Levity 45.
Don’t hesitate to reach out and ask any questions and also feel free to leave your comments down below. I also want to give a shout-out to Andrew Skurka , a National Geographic Adventurer who is the premier expert on hiking in my opinion in North America. I have learned a lot from his videos and website.


3 day mountaineering trip 
4 day mountaineering trip
Connect Further at Mindful Explorer
Be sure to join along on my mindful journey discovering the benefits of the outdoors, environmental awareness, sustainable lifestyle and mindfulness on social media. My Instagram account is @Stasher_BC and on Twitter the same at @Stasher_BC .
Use the hashtags #MindfulExplorer and #ExploreBeyondTheUsual so I can see how you are leading a mindful life and enjoying the outdoors.

Awesome post – it’s got me stoked to get out there! That North Face pack looks great too, but I can’t justify buying (yet) another pack 🙂 And great job keeping the weight under 30lbs. Of course having access to water all the time is a key to keep that weight down, as you know sometimes that’s not possible unfortunately. Great pics and video too!
Thanks Dave, I have been super impressed with the North Face pack for mountaineering and it carries a rope really well. I filmed the little video clip on a glacier traverse the day before the slog to reach a remote peak.
Hi Chris. I’ve enjoyed your trail comments and pics over the years. Thanks! You’re thinking about switching to a quilt. I’ve used one for all 3 season backpacking on Vancouver Island and Western Canada for about 10 years and wouldn’t go back. Since you already use insulated sleeping pads with very light down bags you might not notice a huge weight reduction. What you will notice is more comfortable sleeps in warmer weather as you can turn under the quilt without it binding and easily ventilate in the first parts of the night when it’s warm and cover up as it gets colder. If you already regularly wear a toque then a hoodless quilt is no problem. The straps on a quilt allow it to go down below freezing to about -3 to -5 in my experience before I start to think I need to switch to a full bag. In these cases it’s always the small draft that causes discomfort rather than the complete lack of a bottom to the quilt.
David, this is exactly the information I have been after from a local and not from youtube videos of thru-hikers in southern warm climates. The reason you like it for summer is the same problems I face with a bag, rolling around and ventilation. I look forward to getting one in the near future. What brand are you currently using now?
For the last 5-6 years I’ve used an Enlightened Equipment Revelation 20F quilt. After the first season in the
Alberta Rockies I opened it up and added more down. It currently is at about a 10F rating and I find it perfect for Alberta from mid April through to mid October. It has 800 downtek fill and seems to be handling moisture well. It airs out fast and dries quickly if it gets damp. When I’m on the Island I often find it too warm and rarely use any of the straps so it vents better. I used to have a 30F Montbell bag and it seemed perfect for Island mountain hiking. I think a 20F quilt would be good for the Island especially if you were spending time higher up on the slopes but a 30F would be good if you were okay using a down jacket etc on the coldest nights. Before the Revelation Quilt I had a GoLite 20F for some years. As it aged I ended up adding some fill to it for Alberta as well. The GoLite (now MyTrail) was not as well designed for fill pattern as the Revelation. The fill in the GoLite always migrated because it was underfilled to the sides where it didn’t keep warm. It was handy though in warm weather where you could move the fill away. My wife hates the idea of quilts and refuses to try one. She figures that the pad would have to have batteries before she would consider trying it out.
Great stuff Chris. We just got a MSR Elixir tent and really liked it. It makes sense to invest in a nice down sleeping bag. Still loving my MEC -12 sleeping bag which I purchased about 13 years ago.
Under 30 lbs is pretty fantastic IMO. 🙂
Optimizing your backpack is much like the personal finance world, we are driven to improve things every opportunity we get. MEC equipment from 10-15 years ago from what I have seen from others is some of the best they ever made in terms of quality and durability.
Appreciate you sharing this! Any thoughts on freestanding vs semi freestanding tents for Vancouver island (and mainland?) terrain and wet weather? Am looking for a lightweight tent and keep wavering between the two. Thanks!
Hi Karen, I have had both the freestanding and semi-freestanding tents. My previous tent was a Big Agnes Fly Creek UL2 and I found I struggled some times if I couldn’t find the perfect tent spot. The biggest struggle was setting up on rocky terrain where pegging out the tent is key to the semi-rigid structure standing up properly. It was this reason and only if you primarily spend time on ridges and alpine rock that the freestanding was much preferred. As for rain it wasn’t a problem for either tent.
Great post! You are taking packing efficiency to another level!
Thanks JR, it has taken me a while to get to this point. I started out with a huge pack and very heavy as well but over time learned from others and read articles like this one. Cheers
Thanks JR , lots of trial and error along the way. I could probably be even lighter but this pack weight feels good and I can really depend on all my gear to meet any challenges along the way.
Appreciated your prompt to reuse plastic – I save all my Trader Joe’s zip bags all year -big bag in closet- then use all hiking season for day’s food like articulated here
Its really tough with backpacking food to minimize plastic but if there is a way to reduce it I do my best. Thanks for stopping by and leaving a comment.